
This article walks you through making your first Instagram Reel for your dropshipping store, start to finish. Open the Reels creator, plan one clear message, pick fitting audio, film with your phone, edit, add readable text, and share.
You will see the exact order to work in, the few habits that make beginner Reels look polished, and the moves that turn a Reel from a view into a store visit. You only need a smartphone and a plan you can follow today.
Nir Eyal captured why Reels work so well for store owners who are willing to show up with real video.
“The future belongs to those who master their attention.” — Nir Eyal
Attention is the whole game on Instagram, and Reels are where attention is cheapest to earn right now if you post with intention.
I have mentored more than 3,270 students across 17 years of ecommerce, and the ones who win with Reels are not the ones with the fanciest gear. They are the ones who film, post, measure, and improve one small thing on the next Reel. My dropshipping content marketing guide, my guide to going viral, and my TikTok marketing playbook all pair well with everything below.
Open the Reels creator and pick the quickest way in
Start by choosing the path that matches the footage you have. Instagram gives you three ways into the same Reels creator.
- The Create (+) button. Tap it on your home screen and select Reel.
- The Reels tab camera icon. Open the Reels tab and tap the camera in the corner.
- The Stories camera swipe. Swipe over to the camera from your Stories screen.
All three land you in the same place, so use whichever your thumb finds first. If you want to record live, any of them works. If you already shot clips on your phone, tap the gallery square once you are inside and pull them from your camera roll. Button positions shift from time to time, so if a button has moved, look for the same icon nearby. The core flow stays the same. Record or upload, edit, add text and audio, share. My dropshipping launch checklist covers how Reels fit into the first 30 days of a new store.
One more thing before you tap record. Decide your cover, caption, and audio before you tap share, because some settings may lock once the Reel is live.
Mentor Tip. I have my students open the creator and poke around before they film anything. 5 minutes exploring the tools makes the whole process feel 10 times less intimidating when the camera is actually rolling.
Find inspiration and plan one simple message
Before you film, decide what one thing the viewer should know or do afterward. The strongest Reels begin with one clear message and a specific outcome, and a plan keeps you from posting messy, disjointed clips. For a store owner, that outcome might be awareness of a product, a quick demo, or a tap through to your product page.
Then scan the Reels tab for 5 to 10 minutes. Watch what is getting attention in your niche, save ideas that spark something, and note the sounds you like. Never copy a trend move for move. Put your own spin on it, show your own product, and give it your own personality. My successful dropshipping store examples, my lifestyle brand examples, and my branded dropshipping guide all show how the stores pulling this off keep their videos recognizable.
Keep the structure dead simple.
- Hook (seconds 1 to 3). Show the most interesting thing first. The product in action, or a bold question on screen.
- Body (one to three clips). Demonstrate, explain, or show the before and after.
- Payoff. End on the result or one clear call to action.
Mentor Tip. I have my students write their hook, body, and payoff on a sticky note and tape it next to the phone before every shoot. Short and repeatable beats long and perfect every single time.
Pick audio that fits the Reel instead of fighting it
Audio decides a lot about whether your Reel feels fresh or flat. On the Reels tab, trending audio shows an upward arrow, and you can save a sound so it is waiting for you when you are ready to film. Saving sounds as you scroll is one of the easiest habits to build.
Inside the creator, you can add music from Instagram’s library or use original audio. A few moves that help.
- Search or browse. Tap the music icon and look through trending and popular tracks.
- Save for later. Bookmark sounds you like so you build a bank of options.
- Use your own audio. Record your voice or a product sound when you want something unique.
- Choose your segment. Use the waveform editor to pick the exact part of the track that fits.
Once you have picked a segment, try lining your cuts up with the beat. A clip change that lands on the rhythm makes simple footage feel smoother. Cuts that fight the beat feel off, and viewers notice without knowing why. My Manus video ad guide and my AI design guide both show how to produce short video content faster when you want to post more often.
Start filming with just your phone
Here is my favorite beginner move. Film in your phone’s regular camera app first, then import into Instagram. It gives you higher quality, a backup if the app crashes, and easier precise cuts. You can still record inside Reels when you want something quick. Both work, but filming from your camera roll takes a lot of the stress out.
You do not need fancy gear. Effective Reels are consistently made with a modern smartphone, decent natural lighting, a basic tripod, and clear audio. Creativity and consistency beat equipment.
- Phone. Any recent smartphone is fine.
- Light. Face a window and let natural light do the work.
- Support. A cheap tripod or a stack of books keeps shots steady.
- Sound. Record in a quiet room, or add music to cover noise.
- Shot length. Keep clips short and change angles between them.
If you sell physical products, grab close-ups of textures, details, and the product in someone’s hand. Those shots stop the scroll. My one-product store guide and my product page optimization guide both show where that same footage goes to work beyond Reels.
Mentor Tip. I have my students film extra B-roll and close-ups every single shoot. The leftover footage shows up again in Facebook ads, on product pages, and in future Reels, so a 20-minute session can fuel content for weeks.
Combine video and audio inside the editor
Now you assemble the pieces. Tap the gallery plus icon to import camera roll clips, or record clips directly inside Reels. Everything lands on a timeline where you can shape the story.
- Trim and split. Cut dead air at the start and end of each clip.
- Reorder. Drag clips around until the hook comes first.
- Align with audio. Use the waveform to make cuts hit the beat.
- Add extras sparingly. AR effects, stickers, filters, and the draw tool are fun, but a few well-chosen touches look better than a dozen.
Many people scroll with the sound off, so turn on subtitles. The Captions sticker auto-generates subtitles, and you can edit them for accuracy. Always read them through, because auto captions sometimes mangle product names. My batch task guide shows how to turn captioning into a repeatable weekly step so you never post a Reel without them.
Add readable text and captions that pay attention to the viewer
Text turns a nice clip into a clear message. Tap the text tool, type a short line, and then set how long it stays on screen so it matches the clip it belongs to. Short, punchy lines get read. Paragraphs get skipped.
A few rules I give every student.
- Keep text clear of interface elements. Preview your Reel to check that on-screen controls do not cover your words.
- Use captions for the spoken parts. Auto subtitles plus a quick edit keeps things accurate.
- Time it right. Let each line appear just before the viewer needs it.
- Stay consistent. Use the same font style and color across Reels so people recognize you.
Mentor Tip. I have my students pick one on-brand color and stick with it across every single Reel. Fast scanning wins on a feed that moves this quickly, and a repeat color becomes free recognition over the first 30 posts.
Finalize and post your Reel the right way
You are at the finish line. On the share screen, pick your cover first. A clear cover helps people recognize your Reel on your profile, and settling cover, caption, and audio before sharing is the move Instagram itself recommends.
Run this quick checklist before you tap share.
- Cover. Choose a frame or upload an image that shows your product clearly.
- Caption. Use relevant keywords, one call to action, and a few hashtags.
- Tags. Tag products and collaborators when it fits.
- Share to Feed and Stories. Turn these on for extra reach.
- Location and topics. Add them when they help the right people find you.
On length, most creators find 30 to 90 seconds a sweet spot, and Reels over 3 minutes may not get recommended to new audiences the same way. Keep yours as short as your message allows, then tap share. My dropshipping SEO guide and my organic traffic guide cover the keyword side of what goes in the caption.
Use Reel insights to improve the next video you post
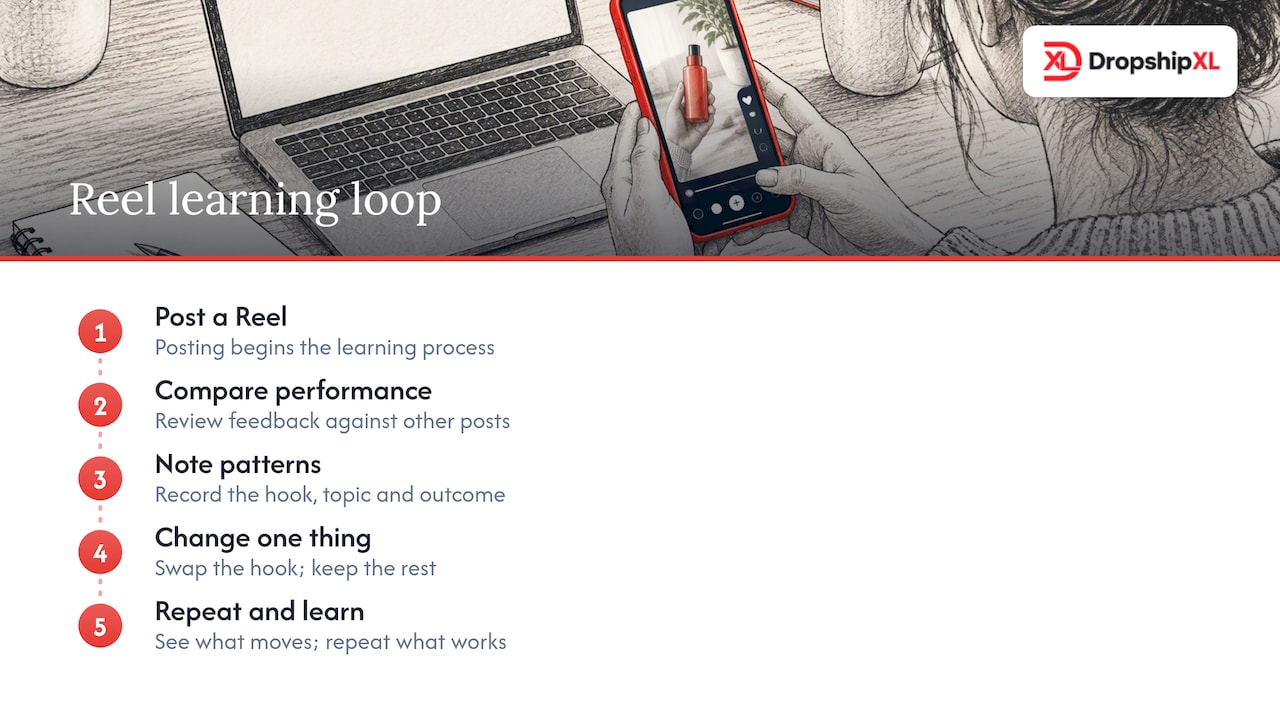
Posting is the beginning of learning, not the end. Review the feedback and performance information available for each Reel, then compare it with your other posts.
You are hunting for patterns. If one hook seems to hold attention better than another, you have learned what is worth repeating. If a product close-up gets more saves than a talking clip, make more close-ups.
Keep the habit simple. After each post, note the hook, topic, and outcome. As you build a collection of Reels, your notes show you exactly what your audience responds to. If your goal is store visits, watch how many people tap through to your profile and link. That tells you whether your call to action is working. My traffic playbook, my conversion tracking guide, and my ecommerce metrics guide all cover what to measure once the clicks start.
Then change one thing at a time. Swap the hook, keep the rest, and see what moves. Small tests beat big overhauls.
Add calls to action that actually drive followers and sales
A Reel with no next step leaves buyers hanging. Decide what you want viewers to do, then tell them in one clear line. Pick a single action per Reel. Follow, save, comment, or visit your link.
- On screen at the end. A short line like “Tap the link in my bio to see it.”
- In your voiceover. Say it out loud, plainly and warmly.
- In your caption. Repeat the same action so it sticks.
- In a pinned comment. Add the link or details for people who want more.
Match the ask to the content. A demo Reel can point to the product page. A tips Reel can ask for a follow. Do not stack three asks in one video, because viewers do whatever is easiest, which is usually nothing. Once your Reel sends people to your store, the page has to do its job. My store design guide, my trust badges guide, and my repeat buyers breakdown show the first fixes that pair well with video traffic.
Use trends and viral formats without losing your voice
Trends move quickly, and you do not have to chase every one. Spend a few minutes a week on the Reels tab and notice what repeats. A sound, a template, a reveal style, a “day in the life” format. Those repeating patterns are the formats viewers already understand.
Then make the format yours. If a trend is a before-and-after reveal, show your product solving a problem. If it is a quick-cut montage, show packing an order. The format gets attention, and your product gives it a reason to matter.
- Pick trends that fit your niche. A mismatch confuses your audience.
- Move promptly. Trends can fade, so adapt a relevant one while it still feels timely.
- Keep your hook strong. A trending sound cannot save a weak opening.
- Reuse your clips elsewhere. The same footage works across platforms, and my Facebook vs TikTok ads breakdown and my influencer marketing guide show where it goes next.
Light and shoot quality videos with just your smartphone
Good light does more for your video than a new phone ever will. Face a window and let soft daylight fall on your product or face. Avoid harsh overhead lights and mixed colors, which make skin and products look off. If you shoot indoors at night, use a lamp or two on either side.
- Shoot vertical. Reels are full-screen and vertical.
- Clean your lens. A quick wipe fixes hazy footage more often than you would think.
- Hold steady. Use a tripod, or brace your elbows against your body.
- Mind the background. A tidy, simple backdrop keeps attention on the product.
- Check the sound. Record a few seconds and play it back before the full take.
Do a quick test clip each time you set up. One minute of testing saves you from a reshoot. Over time you will learn exactly where the best light falls in your space, and setup gets faster with every video. My first-sale fast guide and my scaling strategies guide both show how these small reps compound once you have a consistent posting rhythm.
Turn Reels into real store traffic that actually buys
I have mentored thousands of students, and the ones who win with Reels do the same boring thing. They keep testing. I have my students try different hooks for the same product before they decide a Reel “does not work.” Reuse your best clips across platforms. Then measure link clicks, not just views, because clicks are what turn into customers.
Do not wait until you feel ready. Your first Reel will be rougher than your tenth, and that is fine. Every video teaches you something your next one will use. My Facebook Ads guide, my Google Ads vs Facebook comparison, and my affiliate marketing guide show how organic Reels become the top of a wider funnel once you have proof of what resonates.
How DropshipXL helps you turn Reels into real sales
Views are nice, but buyers need somewhere good to land. That is where my team comes in. My 1-on-1 mentoring and done-for-you design shorten the path from a Reel to a product page that converts, so the attention you earn does not leak away.

- MVP PRO Dropship Design Package. A done-for-you design priced at 2,897 dollars one-off, built around a product your Reels can land traffic on.
- DropshipXL Academy Membership. 997 dollars per year, with a structured curriculum for learning a repeatable marketing workflow.
- DFY Focus 1 and Mentoring package. A lighter 697-dollar entry point for sellers who want a single high-converting page with direct guidance.
- Free 30-minute dropship mentoring call. Walk through your Reel strategy and your store together before you commit to anything.
FAQ
How do I actually upload a Reel from my phone
Tap Create (+) on your Instagram home screen, select Reel, then tap the gallery square to choose clips from your camera roll. Edit them, add audio and text, then continue to the share screen to add a cover and caption. That is one of three ways to start, and the other two land you in the same editor.
What is the difference between an Instagram post and a Reel
Reels are short, full-screen vertical videos designed to reach people who do not follow you yet. Standard feed posts focus on images or carousels and are typically shown to people who already follow your account, which is why Reels are the better move for a new dropshipping store trying to build audience from scratch.
How long should my Reel actually be
Shorter is safer for beginners. Most creators find 30 to 90 seconds a sweet spot, and Reels over 3 minutes may not get recommended to new audiences the same way. Make it only as long as your message needs.
Can I make a Reel on my computer
Yes. Reels can be shared from both mobile devices and desktop by selecting the Create option in Instagram on the web. Many beginners still find the phone app easier for editing, since audio and effects are closer at hand.

Here are 4 other ways I can help you when you're ready: